Following on from the previous post about scaling troop formations at 1:120 scale for Brigade / Regimental level , I thought I would have a hack around with the Empire V stats to see what I could come up with to produce a combat mechanism that works well at this scale.
Today I am looking at the effects of Firepower from massed musket volleys and batteries of cannon of various calibers. In this section, I am looking only at material losses and casualties caused by firepower. (Morale - I will look at later)

Back to the Future
First place to start is Empire V.
30+ years old already, but still one of the most detailed systems out there. Being a product of the 80's .. it has a real old school feel to it, which in this day and age tends to cop a lot of flack for some reason. Somewhat unfortunate I think, because it is not THAT hard at all.
Out of interest, there is still quite a solid community around this rule set, which given the age ... and the excellent new offerings in the same market, is quite remarkable. There is probably a good reason for that.
For those of you that dont yet know - Empire uses an amazingly detailed combat resolution system that involves quite a few calculations, LOTS of tables, LOTS of troop grades, and even pages of flowcharts to get you through small sections of the rules. If you like detail, you will love Empire.
For combat results from firepower - everything is worked out to the percentile, roll a few dice, lookup a few tables, and calculate the casualties from everything to artillery fire and musketry.
Casualties are then displayed as number of figures rendered ineffective.
First, a few GOOD things about this system :
- The effects of firepower are deterministic. If you do the right thing and line up a decent attack, you will produce casualties.
- You cannot get ridiculous results due to unusual die rolls.
- The calculations are backed by a lot of serious period research.
- The mechanics of the calculation .. whilst they do involve a lot of different tables, are actually pretty simple, clean and consistent.
"Modernizing" Empire
Now, there have many attempts to make use of this excellent source material in the Empire combat charts, and jazz it up with more modern gaming mechanics make it faster / more fun to play.
A lot of these have got the maths right up to point, by keeping the probabilities of the average results in line with the Empire probabilities.
You can do this by substituting the fun 'bucket-o-dice' method with a probability curve where the peak sits inline with the peak of the original probability curve.
However - and this is a BIG however, the standard deviation of the probability curve on the bucket-o-dice method is wildly larger than the more deterministic approach used in the original Empire. Makes for a good game, but its still not so good mathematically.
A little bit of spread is not a bad thing - those random outlier events do add some uncertainty to the game, which can add flavour when they happen at the right time. But its not that amusing when thousands of muskets roar at close range ... and some really odd dice rolls tell you that it had no appreciable effect. Thats not fun - even when it happens to the opponent.
So, I have put some effort in with these new tables to find a better balance between deterministic results and fun mechanisms .. whilst keeping the maths more inline with the original.
Summary of The Approach
A quick summary of the things that I am trying to do with this are :
- REDUCE table lookups and calculations to a minimum. I get enough of that at work ... gaming time should be fun.
- ADD some gaming chrome.
- ADD some fog of war.
- Make some minor adjustments applicable to brigade / regimental level gaming.
Approach taken :
Reducing table lookups is simple enough. A combination of dice and rules of thumb provide well tested mechanisms. You find this approach being used in a lot of systems that are popular at the moment.
Just have to be careful with the maths and that whole standard deviation issue.
One thing that I find hurts my brain during a game is die roll modifiers. I hate them !! Just having to add +1 here, and -2 there may be simple enough, but I find that it requires that you set aside some of your short term memory to perform these calculations. Dont like !
Fog of War / Brigade level adjustments.
One thing with Empire is that you tend to play the game at both Corps/Army command level as one game, and Divisional/Brigade commander at another. Its almost like 2 games in one - and that sits well when you have lots of players in the game.
Because of this, there is a lot of detail at the battalion level (number of casualties for example), that an officer at the Corps level would really have no way of knowing during the battle.
To translate a game up to brigade level, where you are just a Corps commander only, it is best to hide some of the detail happening down the line.
Ive taken a Schroedinger's Cat approach to this, and defined 'Casualties' as something a little more rubbery. Its a mechanism that comes out of KISS Rommel - WW2 operational scale rules, that is so simple and yet so coincidentally accurate.
When a 'base' of figures gets to half strength, its considered 'killed'. But 'killed' bases can be randomly recovered during the game. In a WW2 context, this is modeled as a whole battalion vanishing off the map as it is dispersed. It may re-appear on a good roll of the dice, or it may be lost for good. As Corps commander, you don't know the full details until after the event,
So I like that mechanism enough that I think I will use it for naps as well.
Figure Scaling Effects
The default scaling in Empire is :
1" on the table = 40 yards, and 1:60 for the figure scale.
For whatever reason, I will be playing at 1:120 scale, which is half that of the default. I have taken that into account with the tables generated below.
Using a figure scale of 1:120, and a ground scale of 1" = 120 paces (distance that troops march in 1 minute at quick time pace in perfect conditions), which provides a convenient mapping scale of 1' on the table = (almost exactly) 1km in real life. Nice !
With a figure scale of 1:120, that gives me little bases of 3 figures, representing 360 troops in 3 ranks on a 30x20mm base. (120 men per rank on a frontage of around 120 paces). 2 of these bases make up a French Battalion at full strength for example.
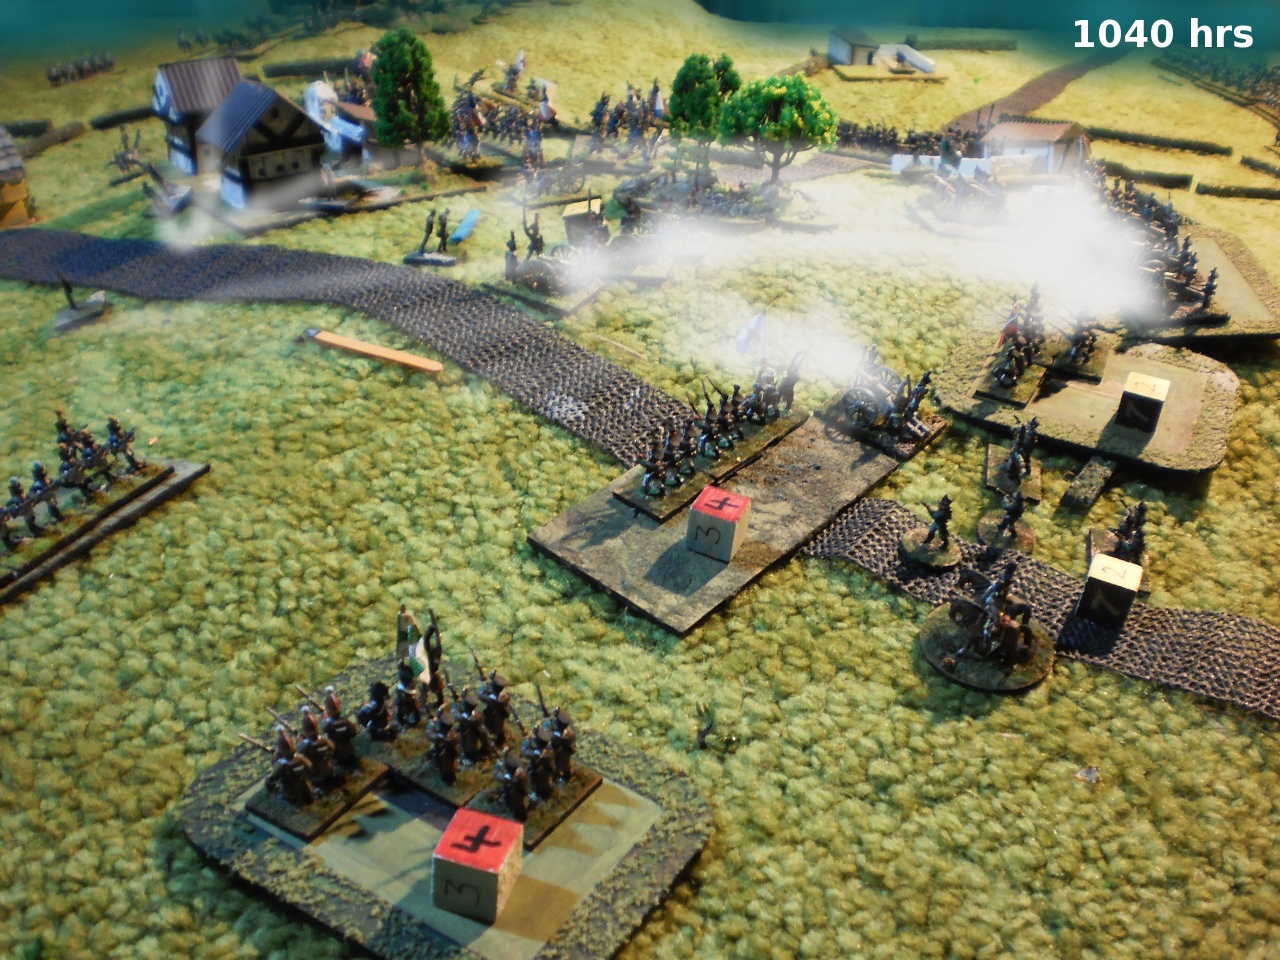
 |
| A visual description of battalions of 3 rank troops in a variety of formations on the table top. |
For troops in 2 ranks, I will be using 2 figures on a 1" x 0.5" base representing 240 men. I kind of like the quirky idea of having the continental troops based on the metric system and the Brits on imperial system bases.
Crazy perhaps ... but it makes sense to me in a perverse way.
So now, after having crunched the numbers with all the various casualty charts, which depend on a number of factors such as :
- The troop grade of the firer
- The number of ranks firing (3 vs 2)
- The range of the shot.
- The formation of the target unit (Column/Line/Square/OpenOrder/Skirmish/ClosedColumn)
- The cover of the target unit.
Also works for my 2 figure British bases ... since in both cases, a 'Base' of troops at full strength is always 120 muskets bringing fire to bare.
Representing Casualties - Whats in a Kill ?
I will cover this question now, before looking at the charts, so at least it is explained what is meant by a 'KILL' before you read the casualty charts.
In vanilla Empire, with a figure scale of 1:60, each KILL represents 1 casting to be removed from play.
So thats 60 troops taken out of the battle - either dead, wounded, disheartened, or whatever.
At 1:120 scale, each of my figures represents '2 castings' in Empire terms at 1:60 scale.
So a base of standard line infantry in 3 ranks needs the equivalent of 6 KILLs to wipe them out.
That presents the possibility of a quite a bit of bookkeeping. Don't like bookkeeping !
So I am defining KILL as meaning this, at this scale of the game :
- Each KILL means that 10 troops are actually killed, 20 are actually wounded, and the other 90 that make up the casting are in various states of distress. They could even be out of action due to helping the wounded.
- A line of troops in 3 ranks can take more damage than a line of troops in 2 ranks ... since as men drop to the ground in the front, others push forward from behind to take their place.
- Therefore, a KILL represents a good portion of a rank from 1 casting pretty much out of action for one reason or another.
- A UNIT of troops in 3 ranks can handle having 3 KILLs and still perform effectively. When it takes the 4th hit, 1 BASE is removed from the unit.
- A UNIT of troops in 2 ranks can handle having 2 KILLs and still perform effectively. When it takes the 3rd hit, 1 BASE is removed from the unit.
Hence the Schroedinger's cat quantum thing - you don't know whether the cat is dead or alive until you look in the box .. so until that happens, the cat is considered somewhere in limbo.
Musketry Fire
Musketry fire involves any small arms fire from any large group of weapons, at ranges from out to 300 paces, down to 50 paces.
This includes battalions of infantry firing volleys at the enemy. This can also include volley fire from the light infantry formed up in closed ranks .. and it can also include prepared volley fire from cavalry armed with carbines at close enough range.
This method also applies to masses of unformed troops firing aimed shots in open order (eg - 1813+ Prussian musketeers in open order).
For units firing in Skirmish order ... that is treated differently. See the section on Skirmish Fire below.
'Volley Fire' in this sense means a number of volleys fired during a short period of a minute or 2.
If a unit does very well, it may unleash 3 rounds a minute of solid aimed fire with great discipline.
On the other hand, a unit may start off with a decent enough volley, before panic sets in and shots become sporadic.
What we are looking for here is the overall performance of the unit in a short but sharp period of firing.
Procedure :
For each unit firing a volley as a group, run through the following steps :
- Roll 2 firing dice for the whole volley.
- The TYPE of dice used depend on the Firing Class of the unit.
- Check the pair of dice, and determine from that what the overall performance of the unit was.
- Make any adjustments according to the sitations below.
- Now lookup the table, cross referencing the number of bases firing with the overall performance of the volleys. This is the number of KILLS.
- Now apply some extra D6 rolls if there are any special circumstances, as listed below.
Note that some very poor units (militia, etc) only get 1 firing dice.
Note - that as in the real Empire rules, a unit's Firepower skill follows that unit's rating. Old Guard shoot as Old Guard, Grenadiers shoot as Grenadiers, etc.
Some units have a different firepower skill to their general morale grade. For example, Russian veteran line might be classed as Conscript line for fire results, but fight defensively as Crack Line.
Whatever works for you ...
Another method that could be used is to use consistent morale grades for firing, but DROP the calculated "Overall Unit Performance" level down a grade if that force is known to have exceptionally bad muskets, a shocking supply of gunpowder ... a shocking epidemic of dysentery in the ranks ... or whatever situation the campaign calls for.
Something to play with anyway.
Firing Dice Used :
| Firing Unit Troop Grade | Dice 1 | Dice 2 |
| Old Guard | D12 | D10 |
| Guards | D10 | D10 |
| Grenadiers | D10 | D8 |
| Elites | D8 | D8 |
| Crack Line | D8 | D6 |
| Veteran Line | D6 | D6 |
| Conscript Line | D6 | D4 |
| Landwehr | D4 | D4 |
| Trained Militia | D6 | NONE |
| Untrained Militia | D4 | NONE |
Firing Unit Overall Performance :
| If BOTH dice are 8+ | The unit has fired a SUPERB series of excellent Volleys |
| if BOTH dice are 6+ | The unit has demonstrated a SPLENDID display of musketry |
| if BOTH dice are 4+ | The unit has got off a number of FINE volleys |
| if ONLY ONE dice is 4+ | A REASONABLE effort - at least one decent volley has been fired |
| if NONE are 4+ | A poor showing, one half decent volley and SPORADIC fire |
| if NONE are 6+ and ANY roll a 1 | Some misfires and sporadic panic shots - a PITIFUL effort |
| if BOTH are natural 1's | An ABSOLUTE DISGRACE ! |
Adjustments :
- Firing unit in open order - drop result DOWN 1 level.
- Firing unit is shaken - drop result DOWN 2 levels
- Firing unit is broken - drop result DOWN 3 levels
In the case of Militia firing with a single D6, a '1' results in an absolute disgrace, 2 for a Pitiful effort, 3-5 for a poor showing, and 6 for a reasonable volley.
In the case of Untrained Militia ... a single D4 with :
- An Absolute Disgrace
- A Pitiful Effort
- Sporadic shooting
- A Reasonable effort.
Landwehr are interesting. They will usually put in poor showing most of the time, getting in a half a proper volley before firing sporadically at will. On some rare occasions though (1 in 16 chance), they will hold it all together and put in a series of fine volleys .. as good as any Veteran line unit would be expected to perform.
Firing Unit Performance vs Bases Firing = Number of KILLS
| Musketry Bases (6 castings equiv) Firing vs LINE | ||||||||||||||
| 1 | 2 | 3 | 4 | 5 | 6 | 7 | 8 | 9 | 10 | 11 | 12 | |||
| Superb !! | 2 | 3 | 5 | 6 | 7 | 9 | 10 | 12 | 13 | 15 | 16 | 18 | ||
| Splendid ! | 1 | 2 | 3 | 4 | 5 | 6 | 7 | 9 | 10 | 11 | 12 | 13 | ||
| Fine shot | 1 | 2 | 3 | 3 | 4 | 5 | 6 | 7 | 8 | 8 | 9 | 10 | ||
| Reasonable | 1 | 1 | 2 | 2 | 3 | 4 | 4 | 5 | 5 | 6 | 7 | 7 | ||
| Sporadic | 0 | 1 | 1 | 1 | 2 | 2 | 3 | 3 | 3 | 4 | 4 | 4 | ||
| Pitiful | 0 | 0 | 1 | 1 | 1 | 1 | 1 | 2 | 2 | 2 | 2 | 2 | ||
| Disgraceful | 0 | 0 | 0 | 0 | 1 | 1 | 1 | 1 | 1 | 1 | 1 | 2 | ||
Range Effects on Musketry :
| Range Effects | 0-1" | -2" | -3" | -4" | |||||||||||
| Muskets | N/A | Steady, aimed fire from Rifles. Can roll any 1 dice again. | |||||||||||||
| Sharpshooters | Use chart above. | ||||||||||||||
| Rifles | D6 for each kill 4+ = save | ||||||||||||||
| D6 for each kill 3+= save | |||||||||||||||
Grrrr .. blogger can be a pain to get formatting of tables right sometimes !!
What the above means, in plain English - is that KILLs from muskets have no save at up to 1", a 50% save up to 2" and a 66% save up to 3".
Sharpshooters do a little better at longer ranges, as do Rifles.
Rifles get a slight bonus at ranges between 120-240 paces, as they can spend a little more time at that range on getting the breathing right and landing a good shot, as they are trained to do.
Fine Tuning the results for special situations (D6 per kill) :
- Target in Square or Column: 5+ = extra kill.
- Target in Open Order.: 6 = Save
- Target is in Skirmish Order: 5+ = saved.
- Target in Cover: 4+ Heavy, 5+ Medium, 6 Light = save.
.... and thats it for musketry !
.... almost !
Firefight Resolution Shortcut :
Empire V provides a fairly comprehensive firefight resolution system that measures what happens when 2 units fight it out with volleys. This result is in addition to any losses from the shooting itself.
This can get a little involved at times, depending on the situation. Here is a quick shortcut that gets straight to the point :
Whichever side scored the best Overall Performance Result in the musketry round above .. declare them the winner, and roll for the firefight result on Table 2.
If its too close to call, or the 'loser' has some significant advantage such as being in cover, or has a leader attached ... or if there is any doubt at all who the winner clearly is - then roll on Table 1.
Easy !
Artillery Fire :
Same trick with artillery here.
1 model gun at this scale represents a half-battery of 6 guns, spread out about 20 paces per gun.
Procedure :
- Measure the range (in inches)
- Count the number of gun models firing.
- Cross reference to determine the number of KILLS.
Each fractional number on the chart = probability of another kill.
e.g. 1.7 kills = 1 definite kill, and a 70% chance of a second.
70% can be translated as 'Roll D10 <= 7'.
Firer Class Adjustments :
- French Old Guard : ALWAYS round up to the next whole number. So 2.0 on the table = 2 kills, but 2.1 kills on the table = 3 kills.
- 1st Class batteries. If fraction die fails to score an extra kill, but is EVEN, then its still a kill after all.
- 2nd Class batteries. No change.
- 3rd Class batteries. If fraction die gains an extra kill, but is ODD, then it is not a kill after all.
| Light Cannon | Medium Cannon | Heavy Cannon | |||||||||||
| 1 | 2 | 3 | 4 | 1 | 2 | 3 | 4 | 1 | 2 | 3 | 4 | ||
| Range | 1" | 0.7 | 1.4 | 2.1 | 2.8 | 0.9 | 1.8 | 2.7 | 3.6 | 1.2 | 2.4 | 3.6 | 4.8 |
| to | 3" | 0.4 | 0.8 | 1.3 | 1.7 | 0.5 | 1.1 | 1.6 | 2.2 | 0.9 | 1.8 | 2.7 | 3.6 |
| Target | 5" | 0.4 | 0.7 | 1.1 | 1.4 | 0.4 | 0.8 | 1.3 | 1.7 | 0.6 | 1.2 | 1.8 | 2.4 |
| 8" | 0.2 | 0.4 | 0.5 | 0.7 | 0.3 | 0.6 | 0.9 | 1.2 | 0.4 | 0.8 | 1.2 | 1.6 | |
| 12" | 0.1 | 0.1 | 0.2 | 0.2 | 0.1 | 0.2 | 0.4 | 0.5 | 0.2 | 0.4 | 0.6 | 0.8 | |
| 18" | 0.1 | 0.1 | 0.2 | 0.2 | 0.2 | 0.3 | 0.5 | 0.6 | |||||
| 24" | 0.1 | 0.2 | 0.2 | 0.3 | |||||||||
Fine Tuning the results for Special Situations (D6 for each kill)
- vs Square: 4+ = extra kill.
- vs Column: 6 = extra kill for 2nd rank. 5 = extra kill if more than 2 ranks of bases in the column.
- vs Open Order.: 5+ = saved
- vs Skirmish Order: 4+ = saved.
- vs Cover. 3+ Heavy Cover, 4+ Medium Cover, 6+ Light Cover.
Representing skirmish capability can be a bit of a nightmare.
To do it 'properly', you probably need to break down the types of skirmishers into several different classes, and give them all different probabilities of causing some sort of damage to the enemy.
Thats all well and good until you actually calculate all those factors, roll the dice, and then 90% of the time find that the result of skirmish fire is pretty much negligible in the big picture of the whole battle.
Not that I want to skimp on detail, but I just feel that detailed modelling of skirmish fire is a low return on investment in a brigade scale game.
So - Stick to the way that Republique handles skirmishing very nicely.
Real Simple Skirmish Rules :
- Each UNIT with no serious skirmish doctrine ... gets 0 skirmishers.
- Each BATTALION of an army with Semi-Skirmish capability can put out 1 skirmisher per battalion.
- Each BASE of a unit of trained light infantry can put out 1 skirmisher per base.
- Each FIGURE of a unit of elite light infantry (95th rifles, etc) can put out 1 skirmisher per figure. (2 per base)
Skirmisher combat :
- All skirmisher fire is effective out to 4"
- Count up the total number of skirmishers in a contested firefight on both sides. Skirmishers from opposing sides cancel each other out, so one side should have an 'overlap' of skirmishers to shoot at the main body of troops.
- Roll D10 for each skirmisher in the overlap. Natural 0 = 1 KILL.
For UNIT who fight in close combat who are unlucky enough to still have some of their companies deployed out of the line as skirmishers .... -1 on the dreaded ACE table for EACH skirmisher still deployed.
So - if a French Legere regiment of 6 bases has all 6 skirmishers out and it gets hit by enemy cavalry .... its a -6 on the ACE computer, which represents the fact that the unit as a whole is in big trouble !!
Thats all for now.
If the above ideas appeal in any way, I hope you get a chance to playtest some of those ideas in a brigade scale game.
I would be very keen to hear any feedback.
Aside from the charts above, just use standard Empire for the rest of the actions in the game ... which I am finding that despite the perceived 'bulk' of the rulebook, its really quite a sensible system with fast common sense rules that have a good period feel to them.
Next article - I will have a look at the dreaded issue of modelling Morale.
So far, I don't see any huge clunkuness or other problems with the way that Empire tracks morale. Might just need to make a few minor tweaks to accomodate the different scaling, and attach some sort of meaning to the use of the Sabot bases.